
Creating a no dig garden bed can significantly boost your gardening yield while reducing the effort involved in soil preparation. This method not only preserves soil structure but also promotes healthy microbial activity, leading to bountiful edible harvests. If you’re looking to establish a thriving garden with minimal labor, this comprehensive guide will walk you through the process of creating an effective no dig bed, ensuring you reap the rewards of your efforts.
Understanding the No Dig Method
The no dig gardening method revolves around the fundamental concept of minimizing soil disturbance. By avoiding traditional tilling, you allow the soil to maintain its natural structure and ecosystem. This approach fosters a rich environment for beneficial organisms, such as earthworms and microbes, which contribute to healthier plants and better yields.
Benefits of No Dig Gardening
- Improved Soil Health: No dig methods preserve the soil’s organic structure, enhancing nutrient retention and moisture levels.
- Reduced Weed Growth: The layers used in no dig beds suppress weed seeds, leading to less competition for your plants.
- Lower Labor Requirements: With minimal initial digging and ongoing maintenance, gardeners save time and effort.
- Environmentally Friendly: This method reduces erosion and carbon release, promoting sustainable gardening practices.
Materials Needed for Your No Dig Bed
To create an effective no dig bed, you’ll need a few essential materials. The beauty of this method lies in its simplicity; most of the required items can be sourced locally or repurposed from existing materials.
Essential Components
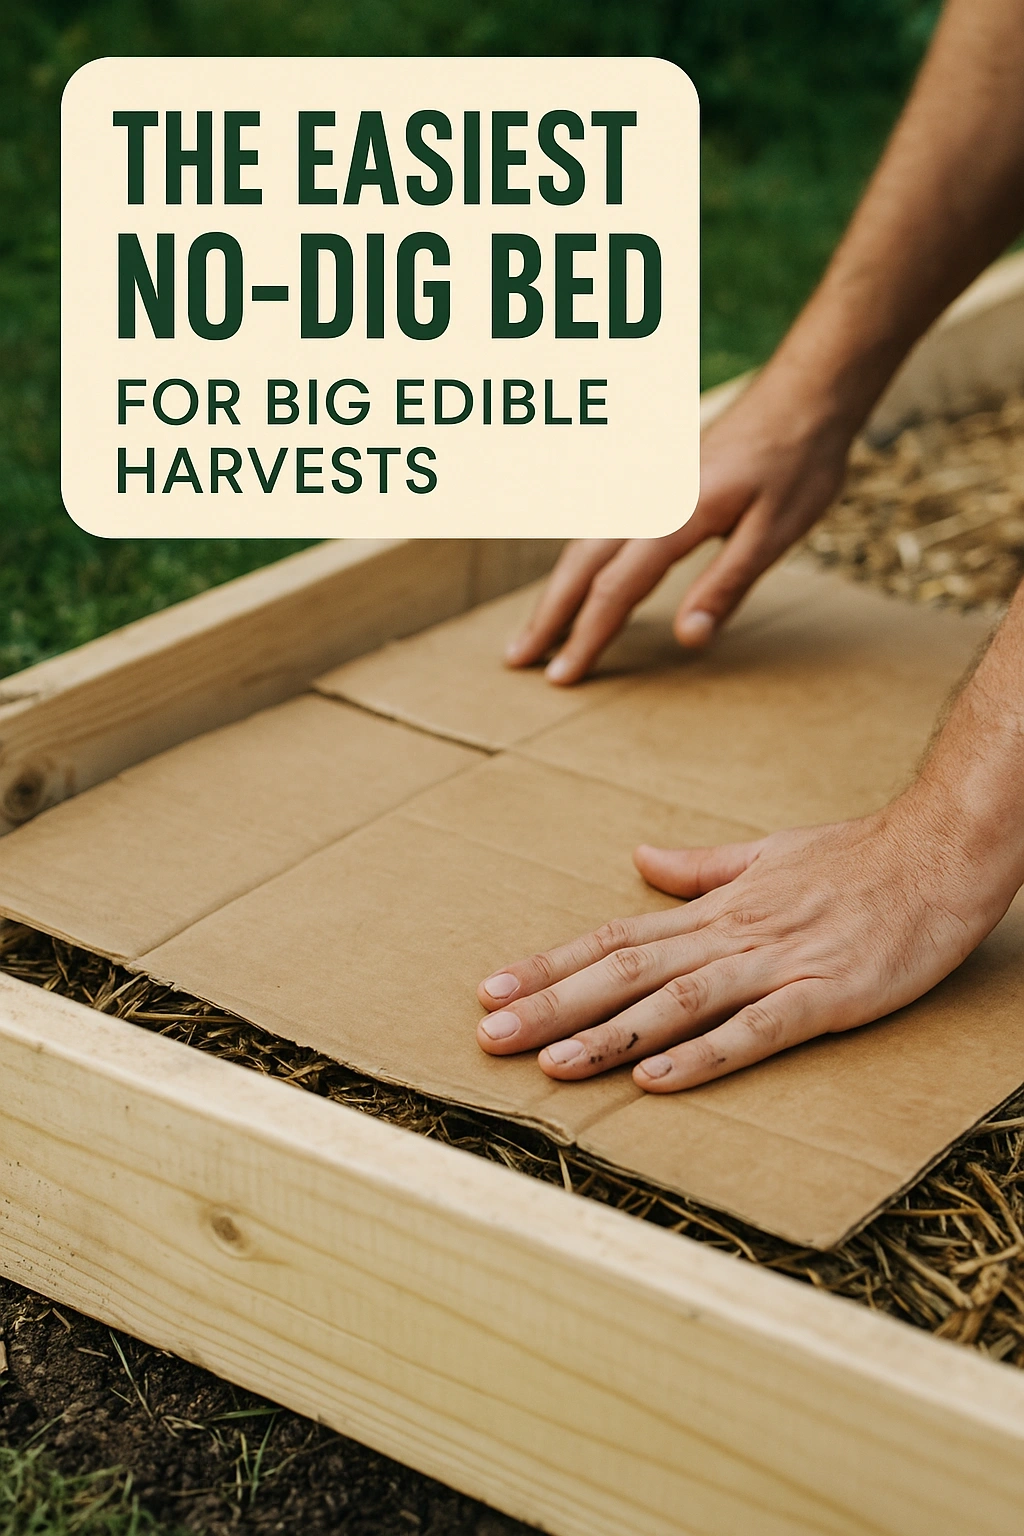
- Cardboard or Newspaper: Use these as a base layer to smother weeds and grass.
- Organic Matter: Compost, well-rotted manure, and leaf mold are excellent sources of nutrients.
- Mulch: Straw, wood chips, or grass clippings help retain moisture and prevent weeds.
- Soil Amendments: Consider adding minerals like rock phosphate or greensand to enrich your soil.
Step-by-Step Guide to Building Your No Dig Bed
Establishing a no dig bed may seem daunting, but following these straightforward steps will make the process manageable and enjoyable. The result will be a flourishing garden that requires less effort over time.
Step 1: Choose a Location
Select a sunny spot in your yard that receives at least six hours of sunlight daily. Ensure good drainage and accessibility for regular maintenance.
Step 2: Prepare the Area
Clear the chosen area of any debris, large rocks, or old plants. If there are existing weeds, cover the ground with cardboard or several layers of newspaper to suppress them.
Step 3: Layer the Bed
Start with a base layer of cardboard or newspaper, overlapping edges to prevent light from reaching any weeds below. Next, add a thick layer of organic matter such as compost or well-rotted manure. Aim for at least four to six inches of this nutrient-rich material.
Step 4: Add Soil Amendments
Sprinkle any necessary soil amendments on top of the organic layer. This can include minerals or other fertilizers suited to your specific plants.
Step 5: Mulch the Surface
Finish off your bed by applying a layer of mulch. This will help retain moisture, regulate soil temperature, and further suppress weeds.
Planting in Your No Dig Bed
Once your no dig bed is established, you can begin planting. The timing will depend on your local climate and the types of plants you wish to grow. Consider both the growing season and the specific requirements of your chosen crops.
Choosing the Right Plants
For no dig beds, consider plants that thrive in nutrient-rich, well-aerated soil. Leafy greens, root vegetables, and herbs often do exceptionally well. Additionally, companion planting can enhance growth and deter pests.
Planting Techniques
When planting, create small holes in the organic layer, place your seeds or seedlings, and cover them lightly with the surrounding material. Water gently to avoid washing away the soil.
Maintaining Your No Dig Bed
Maintenance is crucial for the success of your no dig bed. Despite the lower initial labor, you will still need to monitor and care for your plants to maximize your harvests.
Watering and Fertilizing
Regular watering is essential, particularly during dry spells. Mulch will help keep moisture in, but checks should be made to ensure the soil does not dry out. Fertilizing can be done with organic compost or liquid fertilizers as needed throughout the growing season.
Pest Management
Monitor your plants for signs of pests and diseases. Companion planting can help deter pests, while organic solutions such as neem oil can be used if problems arise.
FAQs
What is the best time to start a no dig bed?
The best time to start a no dig bed is in the spring, after the last frost date in your area. This allows you to prepare the bed in advance of planting, ensuring the soil is rich and ready for crops as the growing season begins.
Can I use store-bought soil for no dig beds?
Yes, you can use store-bought soil, but it’s advisable to mix it with organic matter to enhance its nutrient content and improve soil structure. This combination will provide a healthier environment for your plants.
How often should I add organic matter to my no dig bed?
It’s beneficial to add organic matter to your no dig bed at least once a year, ideally in the fall or early spring. This replenishes nutrients and helps maintain soil health.
Is a no dig bed suitable for all types of plants?
While many plants thrive in no dig beds, it is essential to choose varieties that prefer well-aerated, nutrient-rich soil. Leafy greens, tomatoes, peppers, and herbs are excellent choices.
Can I convert an existing garden bed to a no dig bed?
Absolutely! You can convert an existing garden bed to a no dig system by layering cardboard or newspaper over the existing soil and building up with organic matter as outlined in this guide.
By following these steps and principles, you’ll create a thriving no dig bed that yields abundant edible crops with less labor and greater soil health. Happy gardening!