
Are you looking for an effective way to reduce kitchen waste while using a worm bin that doesn’t smell? A DIY worm bin that fits neatly under your sink is a practical and eco-friendly solution. With the right materials and techniques, you can cultivate a thriving worm habitat that transforms food scraps into nutrient-rich compost, all without unpleasant odors. This guide will walk you through the steps to create your own under-sink worm bin, ensuring a seamless experience in your home.
Understanding the Benefits of Vermicomposting
Vermicomposting is the process of using worms to decompose organic food waste into a valuable fertilizer known as worm castings. This method not only reduces the amount of waste sent to landfills but also enriches your garden soil. The benefits include:
- Environmental Impact: Reduces landfill waste and lowers greenhouse gas emissions.
- Nutrient-Rich Fertilizer: Worm castings are an excellent source of nutrients for plants.
- Odor Control: When done correctly, vermicomposting produces minimal odor.
Why Choose an Under-Sink Worm Bin?
An under-sink worm bin is a space-efficient solution for apartment dwellers or those with limited kitchen space. This discreet location also minimizes the chances of attracting pests, while keeping your composting efforts close to where food waste is generated. With proper management, an under-sink bin can be odor-free and easy to maintain.
Materials Required for Your DIY Worm Bin
Building your own worm bin requires a few essential materials. Here’s a comprehensive list to get started:
- Plastic Storage Bin: A 10- to 20-gallon bin with a tight-fitting lid works well.
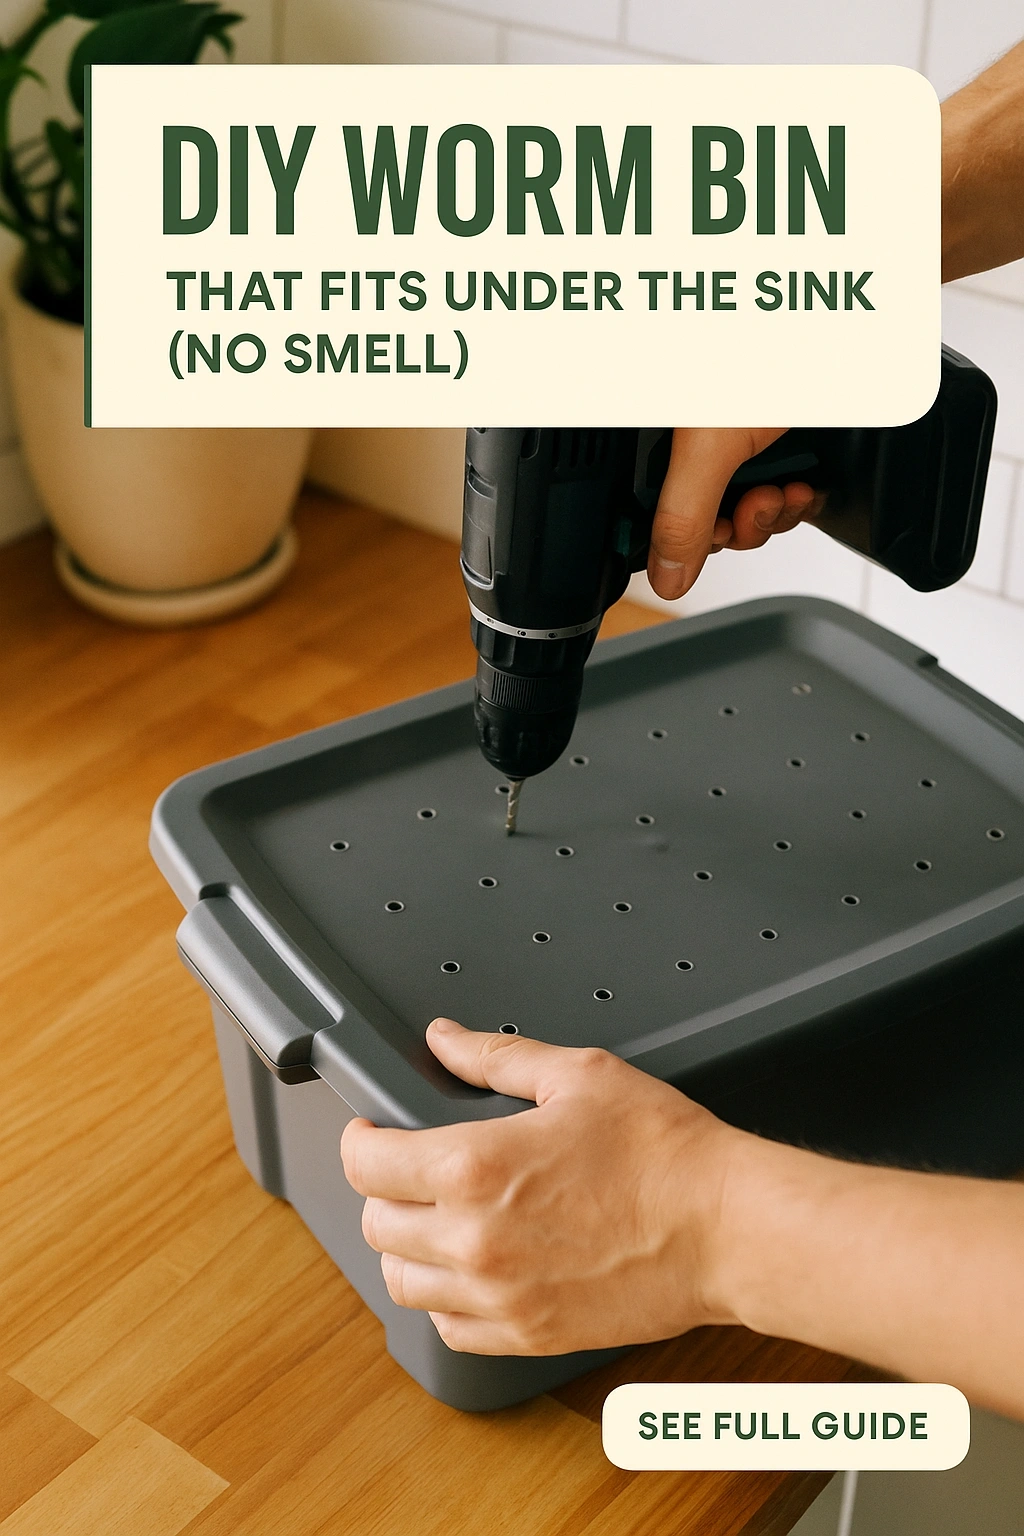
- Drill: For creating air holes for ventilation and drainage.
- Worms: Red wigglers (Eisenia fetida) are the best choice for composting.
- Bedding Material: Shredded newspaper, cardboard, or coconut coir to provide a habitat for worms.
- Food Scraps: Fruit and vegetable peels, coffee grounds, and crushed eggshells.
- Water: To maintain moisture levels in the bin.
Choosing the Right Worms
Red wigglers are specifically suited for composting due to their voracious appetite and ability to thrive in confined spaces. They reproduce quickly, ensuring a robust population that can efficiently process kitchen scraps. Avoid using earthworms from your garden, as they are not as effective in a composting environment.
Step-by-Step Guide to Building Your Worm Bin
Creating your worm bin is a straightforward process. Follow these steps for a successful setup:
- Prepare the Bin: Drill several small holes in the lid and sides of the bin for ventilation. Additionally, create a few holes in the bottom for drainage.
- Add Bedding: Fill the bin with 4-6 inches of shredded newspaper or cardboard. Moisten the bedding lightly with water; it should be damp but not soggy.
- Introduce the Worms: Place your red wigglers into the bin. They should be introduced gradually to reduce stress.
- Add Food Scraps: Begin adding small amounts of food scraps to the bin. Bury the scraps in the bedding to minimize odors.
- Monitor Conditions: Check the moisture level regularly. The bin should feel like a wrung-out sponge. If it’s too wet, add more bedding; if too dry, sprinkle with water.
Maintaining Your Worm Bin
Regular maintenance is crucial for keeping your worm bin odor-free. Check the bin weekly for food levels and moisture. Rotate the scraps to encourage even decomposition and avoid overfeeding; a good rule of thumb is to provide food every 1-2 weeks, based on the worm population and consumption rate.
Solving Common Problems with Worm Bins
Even with careful management, issues may arise. Here are common problems and how to address them:
- Odor Issues: If you notice an unpleasant smell, it could be due to overfeeding or excess moisture. Reduce food scraps and ensure proper drainage.
- Pest Infestation: To avoid attracting fruit flies or other pests, ensure the bin is tightly sealed and food is buried well.
- Worm Migration: If worms are escaping, the environment may be too wet or too dry. Adjust moisture levels to keep them comfortable.
Recognizing Healthy Worm Bin Signs
A healthy worm bin should have a pleasant earthy smell, and you should see worms actively moving through the bedding and food. The bedding will gradually decompose and turn dark, indicating healthy activity. Regularly harvesting worm castings will also signal that your system is working effectively.
FAQs About DIY Worm Bins
How often should I feed my worms?
Feed your worms every 1-2 weeks, adjusting based on their consumption rate. Start with small amounts and gradually increase as they adapt.
What should I avoid putting in my worm bin?
Avoid adding meat, dairy, oily foods, and citrus scraps, as these can attract pests and create odors. Stick to fruit and vegetable scraps for best results.
How can I tell if my worms are healthy?
Healthy worms are active and wriggling. If they appear sluggish or are not reproducing, check the moisture level and food supply.
Can I use regular garden soil in my worm bin?
No, garden soil can introduce pests and pathogens. Use only bedding materials like shredded paper or coconut coir for a healthy worm environment.
What do I do with the worm castings?
Worm castings can be used as a nutrient-rich fertilizer for your plants. Mix them into your garden soil or use them as a top dressing for potted plants.
Conclusion: Enjoy the Benefits of Vermicomposting
Creating a DIY worm bin that fits under your sink is a rewarding and sustainable way to reduce food waste while enriching your plants. By following this guide, you can maintain an odor-free environment and contribute positively to the ecosystem. Embrace the art of vermicomposting and enjoy the benefits of nutrient-rich compost without the hassle of unpleasant smells.